How to Optimise an Image for Web Use
01/02/2017
Images are a very important part of making your website attractive and engaging for your visitors, but they can also be one of the heaviest assets on your site and, if not properly optimised for digital use, can be responsible for your website loading slowly.
A slow loading website can not only result in lost traffic due to visitors refusing to wait for the site to load (especially if they’re on a mobile device using cellular data), but it can also negatively affect your ranking in the search engine results since it's one of the determining factors search engines measure to determine your rank.
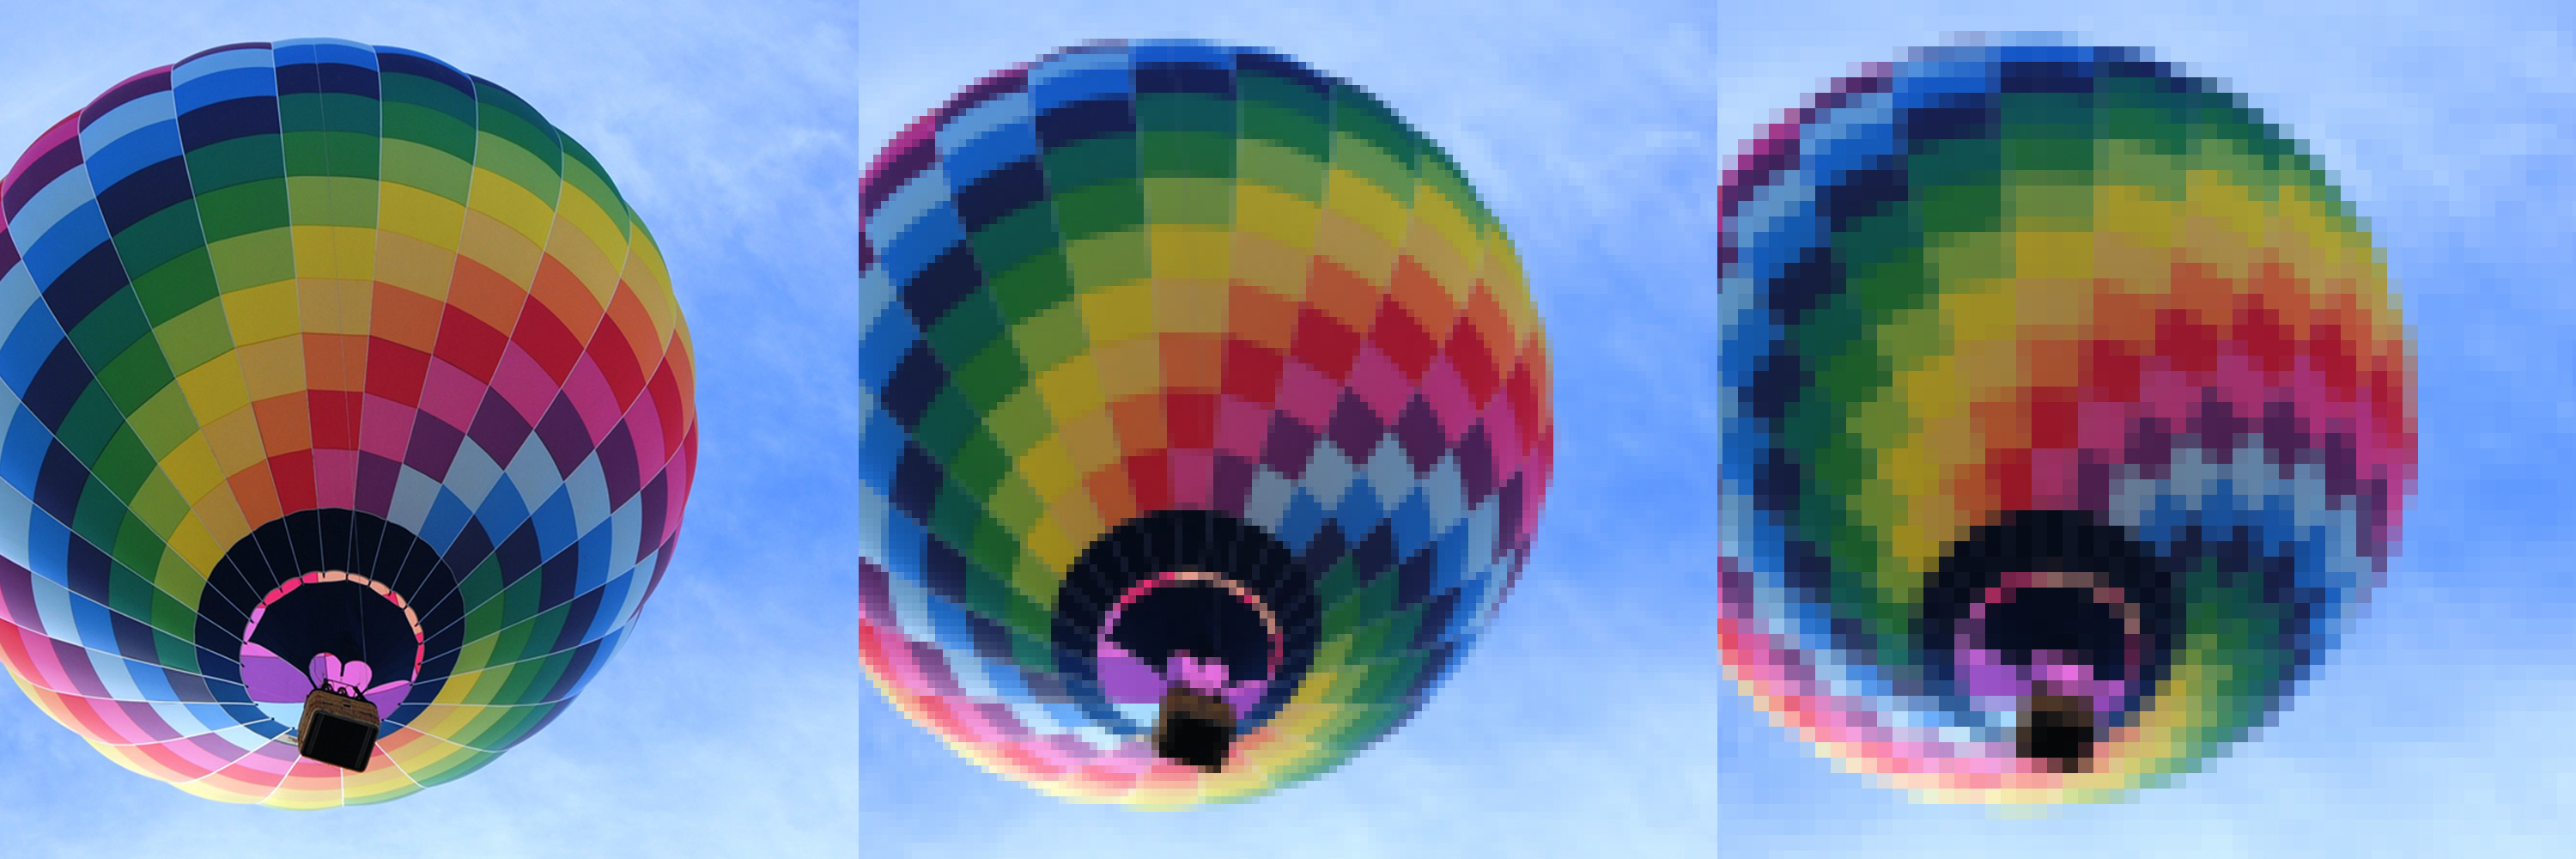
If you’re unfamiliar with how to optimise images for digital use, the below guide should provide a good overview to the processes involved and how you can optimise an image rapidly. The key to optimising images is to find the right balance between a sharp image and a low file size.
The Techy Bit
Pixels Per Inch (PPI)
An image you take on your digital camera will likely have a resolution of 300 pixels per inch (PPI) or higher. This gives your images enough quality to be printed out or enlarged, however, images used on the web don’t need to have such a high resolution. This additional data inside the image simply makes your image take a lot longer to load on your website. For that reason, as a general rule, all images optimised for use online should be resized to a resolution of 72 ppi (which will take place automatically when using one of the optimisation methods we discuss further in the article).
Image Mode
If you have ever owned a standard printer, you will likely be familiar with the colour mode CMYK (Cyan, Magenta, Yellow and Key [Black]) from having to purchase new ink cartridges over time. Printed colour utilises a reflective system of ink and white (white paper) where different coloured inks are absorbed or subtracted to produce the colour you see. Digital colour on the other hand is comprised of red, green and blue (RGB) coloured light, which is added together to create different hues.
For this reason, images should always be converted to an RGB colour mode when they are optimised for web (which again will take place automatically with the optimisation methods we discuss further down).
Compression
Image compression is a key part of optimising an image for digital use and essentially involves minimizing the file size of an image without degrading its quality to an unacceptable level. Earlier we mentioned the key to optimising images is to find a balance between having a sharp image and a low file size; adjusting the compression of an image is the key method of controlling this.
There are two primary types of image compression: Lossy and Lossless. Lossy compression reduces the quality of a file by permanently removing parts of the file deemed redundant in the process. This makes this method ideal for web use, since all we are looking for in a image is whether it’s looks sharp and if it's quick to load online. Lossless compression in comparison is a method of compressing a file by retaining all the original data inside it, which can be recovered by uncompressing it. This is particularly useful if you’re looking to compress and decompress important text or data files that you wouldn’t want to lose any information from.
Digital File Formats:
JPEG is by far the most common file format for digital images and will serve you well in most cases. It allows for significant control when compressing images to acheieve sharp images with very small file sizes. The most important thing to remember about JPEG’s is that the JPEG format does not support transparency; that being the case, if your image needs to feature transparent parts in it you will need to use a different format like GIF or PNG. If your image doesn’t feature transparent parts, then JPEG is probably the best format to use in almost every instance.
GIF is a limited file format that’s useful for two primary purposes: creating animated images (you’ve probably heard the phrase ‘animated GIF’), and for creating images that use a very small colour palette into extremly small files sizes (the GIF format supports a maximum of 256 colours). It's useful to note that the GIF format does support transparency, although a pixel in a GIF image can only be fully transparent or fully opaque, which means that complex transparent images can end up looking fuzzy, with unwanted ‘noise’ in the file.
PNG is perhaps the most versatile file format and is very popular online, although it tends to produce images with the largest file sizes. PNG’s (specifically PNG-24 and PNG-32 formats) offer exceptional support for images with transparency in them, since they allow pixels to inherit different levels of transparency, unlike GIF’s. PNG is also a lossless format, which means they do not lose quality when you edit them, however, this results in one of the only downsides to PNG’s, which is they are often larger in file size.
Optimisation Methods
Using Photoshop's Save for Web Tool
There are many image editors to choose from, but Adobe’s Photoshop is arguably the most popular and is a great tool for not only designers, but marketers and business owners also.
Optimising an image for web using Adobe Photoshop CC is quick and easy to do using the following steps:
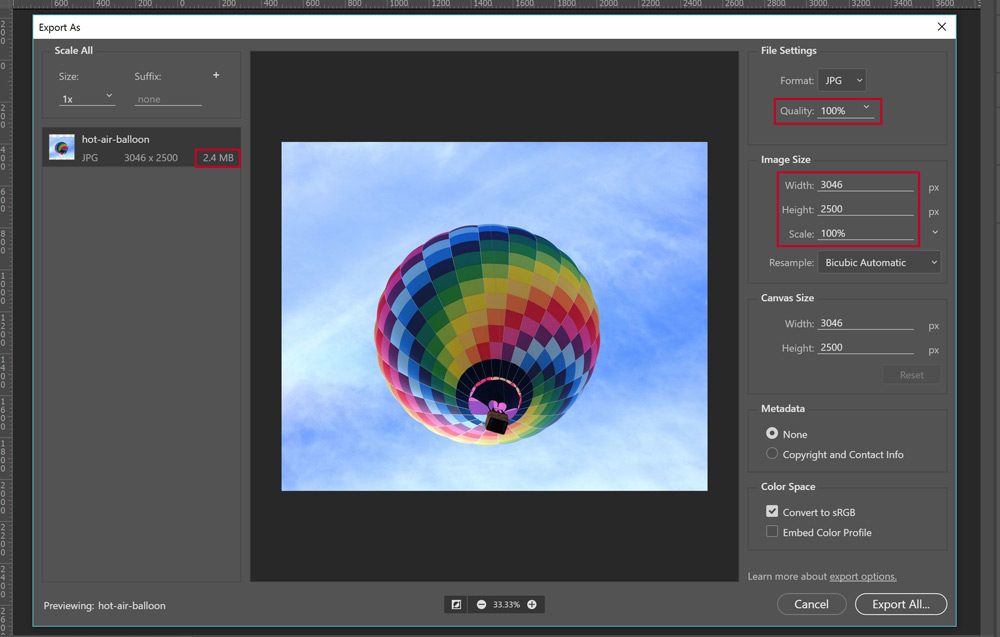
1. On the menu bar select File > Export As... this will bring up the 'Export As' window.
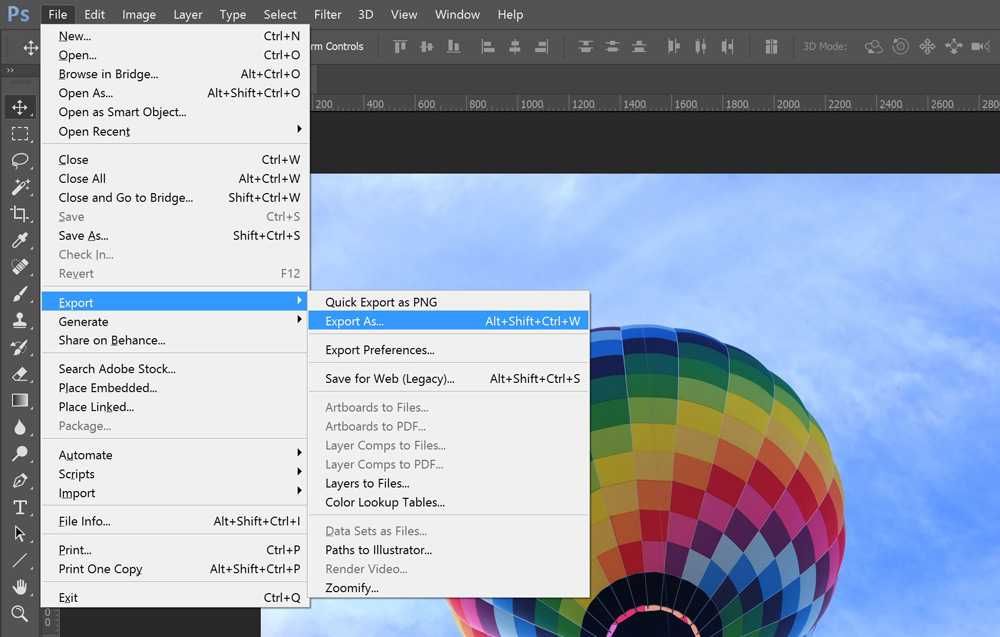
2. Select the appropriate file format to export to.
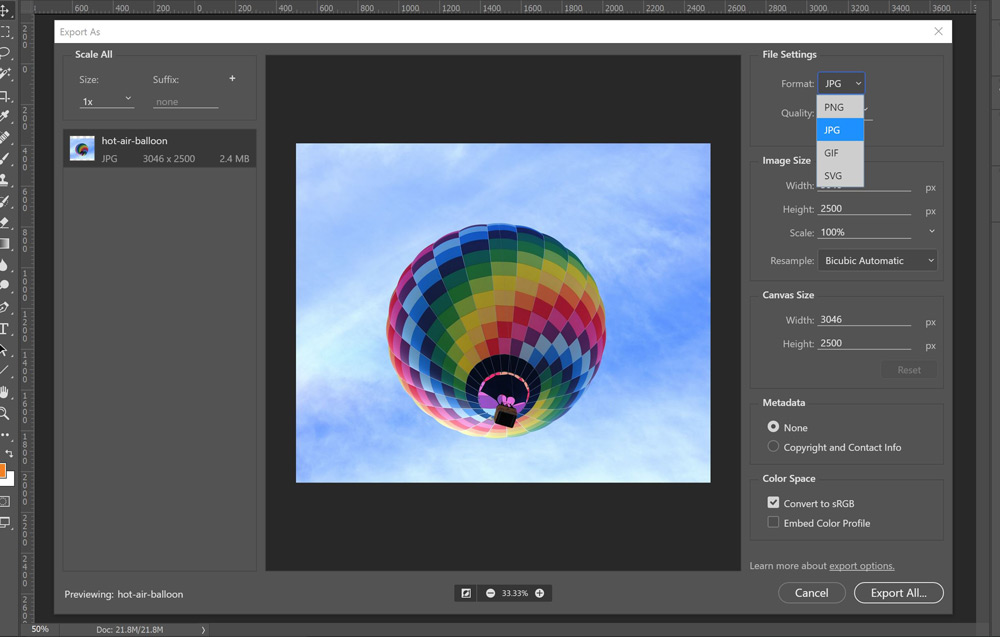
3. By adjusting the quality and size of the image on the right we can significantly reduce the file size. On the left of the window we can see the file size is currently too large for use on the web.
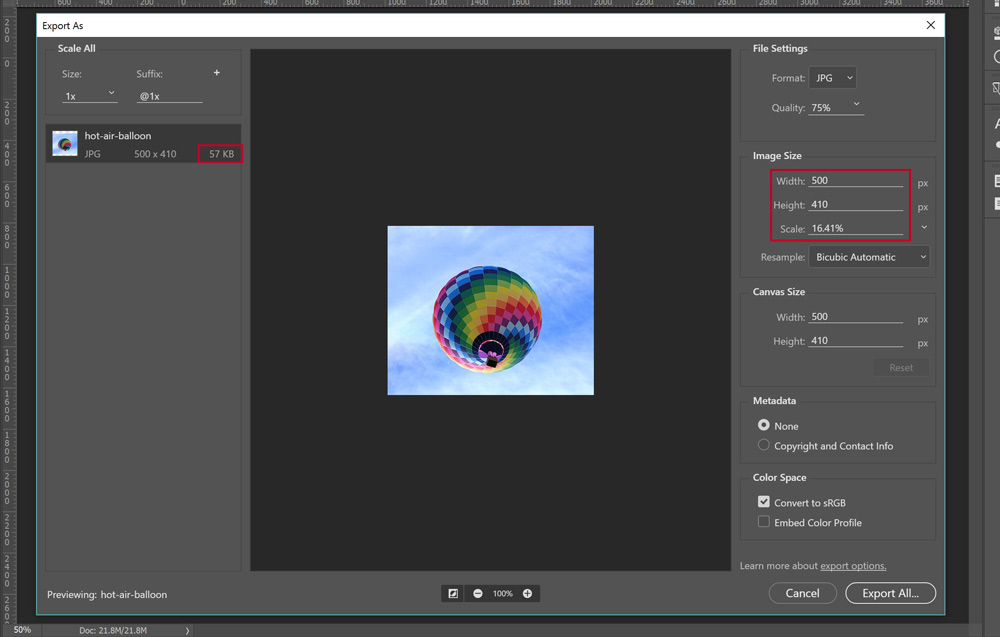
4. Reduce the quality using the slider or by entering the desired number - the lower this number the lower the file size. Around 75% is normally a sufficient reduction without compromising too much of the visual appearance.

5. Reduce the size of the image by entering the desired dimensions in pixels. Adjusting either height, width or percentage will resize the image proportionally.
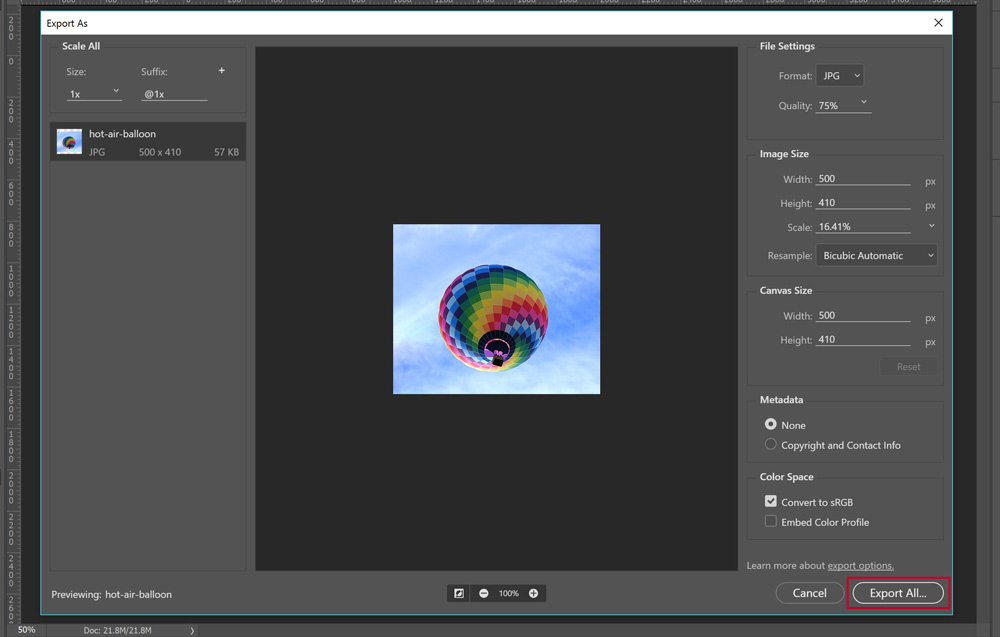
6. Finally click ‘Export All…’ and choose a location on your computer to save the image.
Use a online tool
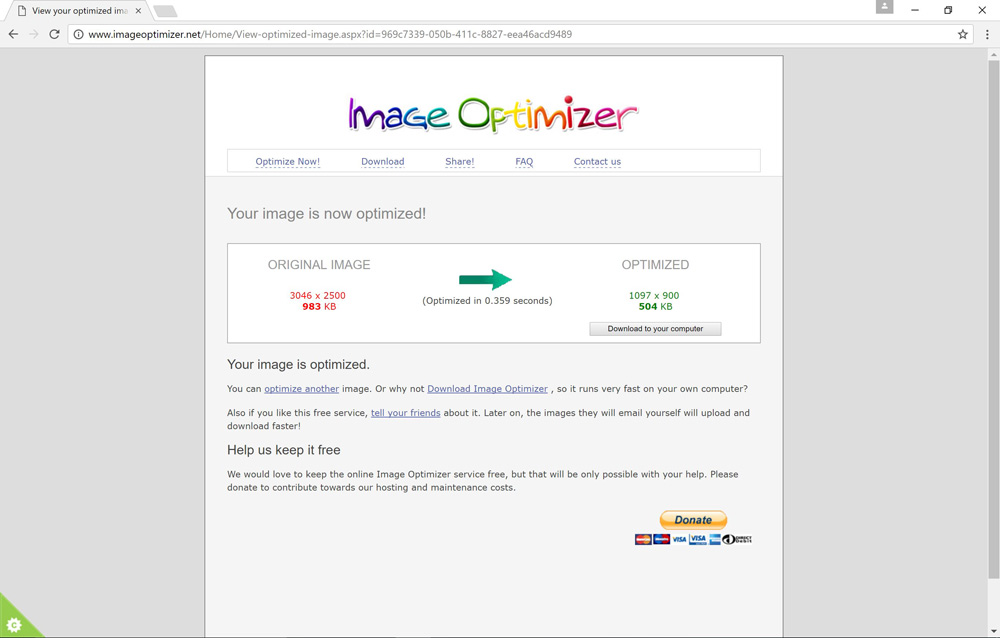
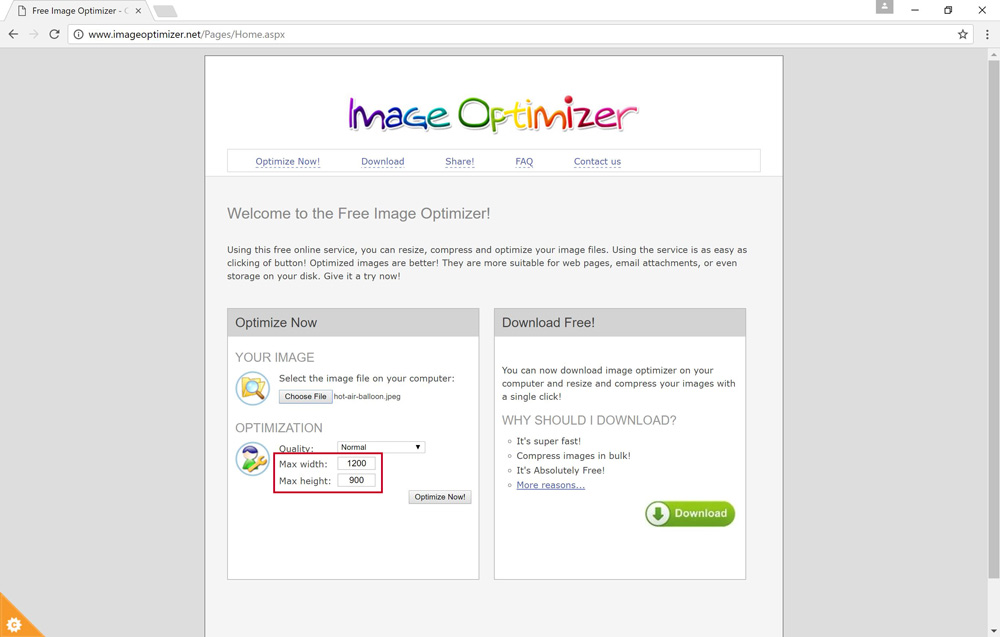
There are also many online tools that make it quick and easy to optimise your images, including: http://www.imageoptimizer.net/
1. Select a file from your computer to optimise
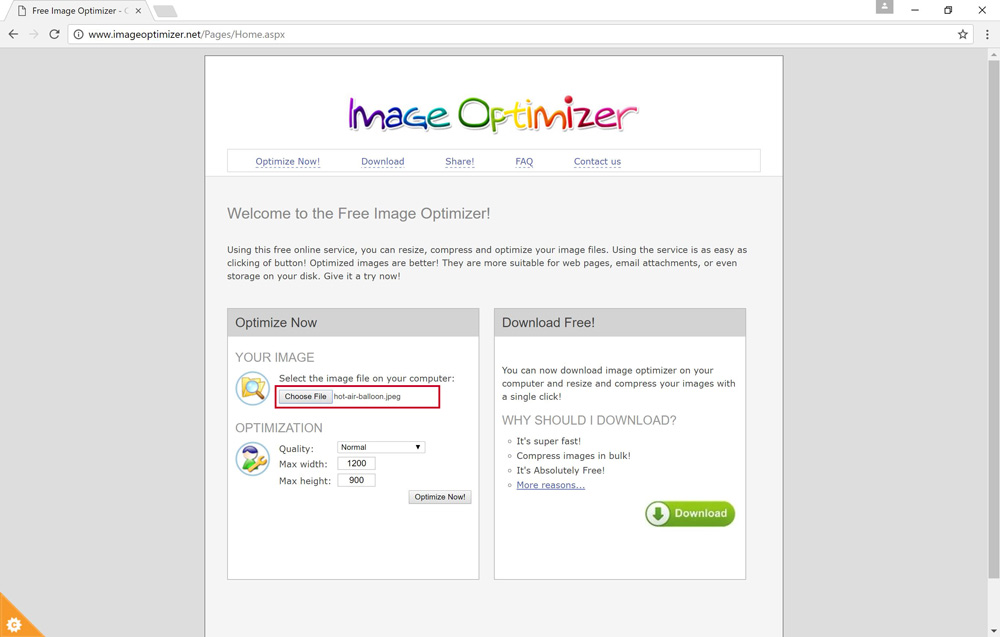
2. Select the quality
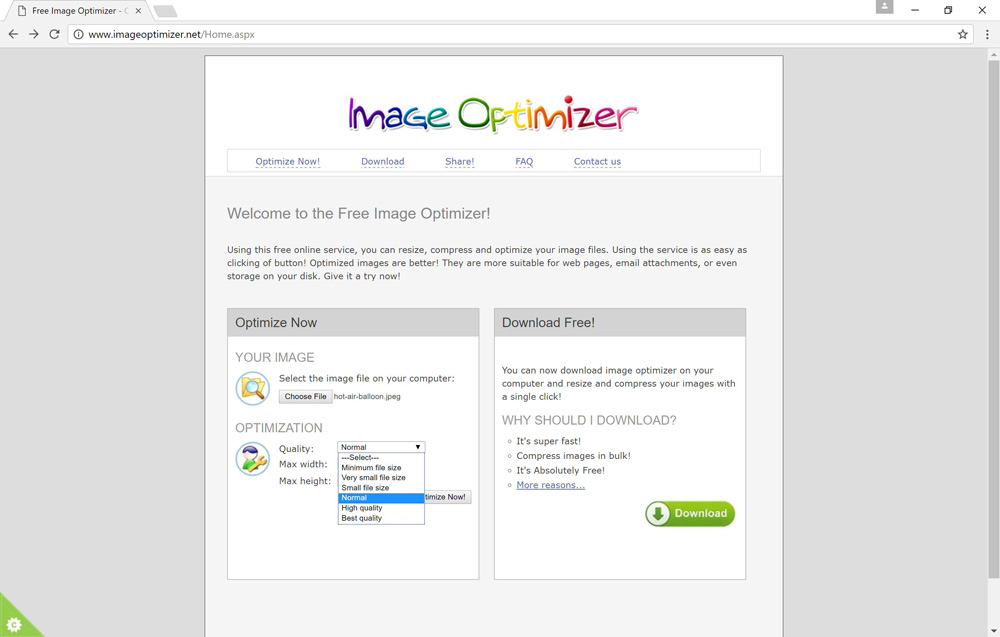
3. Enter the required maximum width or height. Then click ‘Optimise Now’.
4. Click ‘download to your computer’ and choose a location to save your optimised image.